 | www.mari-language.com: | ENGLISH | МАРЛА | ПО-РУССКИ |
| Main page » Keyboard Layouts & Fonts » Fonts » Windows | ||
 | www.mari-language.com: | ENGLISH | МАРЛА | ПО-РУССКИ |
| Main page » Keyboard Layouts & Fonts » Fonts » Windows | ||
Once you have downloaded the font or fonts in the .zip files, extract them. You can do this by right-clicking on a .zip file, and choosing the appropriate option.
You can add fonts through your Control Panel, which you can access through your Start Menu. Depending on your layout options, you might find it here:
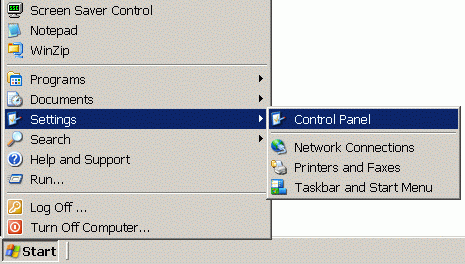
Or here:
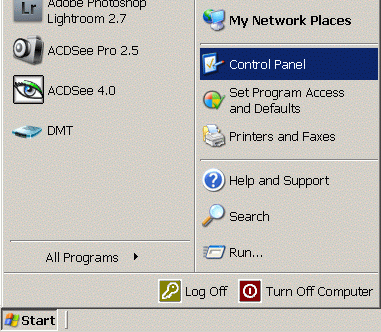
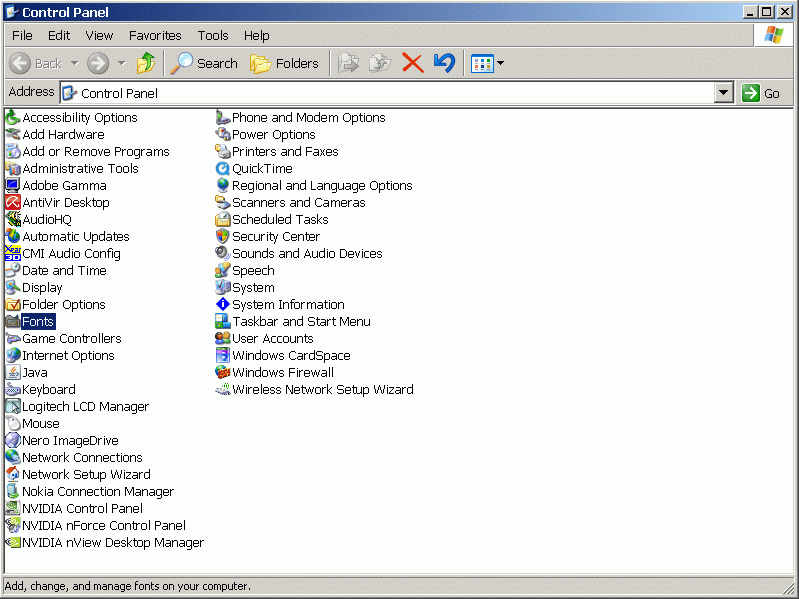
You now need to access the Fonts folder. Depending on your system and layout, these might be in different places. Here is one possible view:
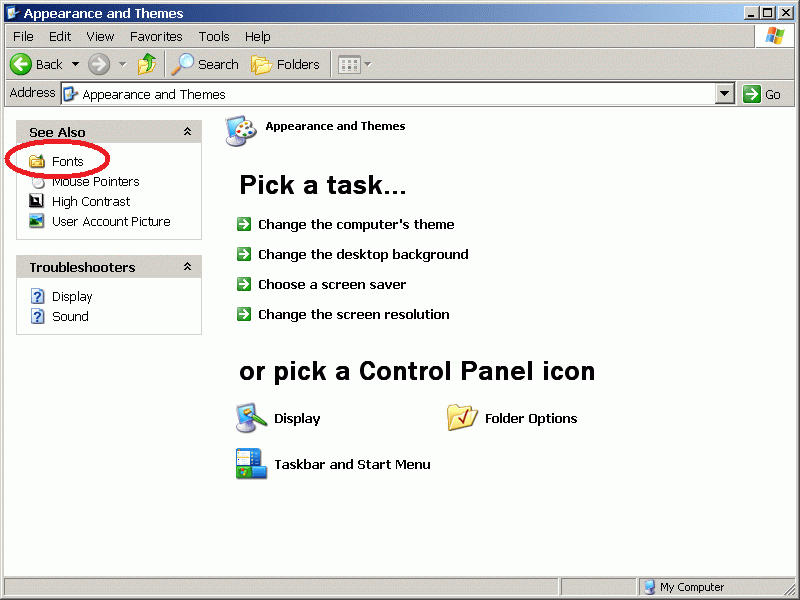
In a second possible view, you have to first click the Appearances and Themes button:
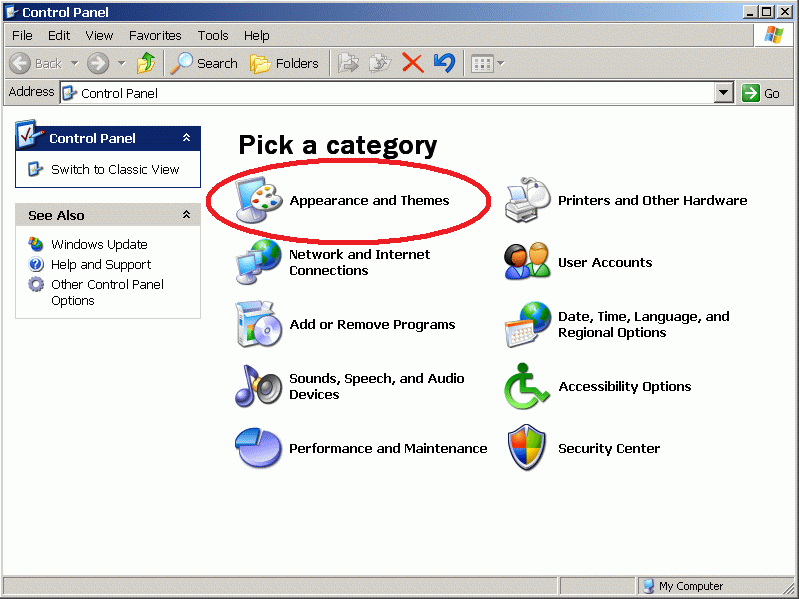
One can access the Fonts section through the next menu.
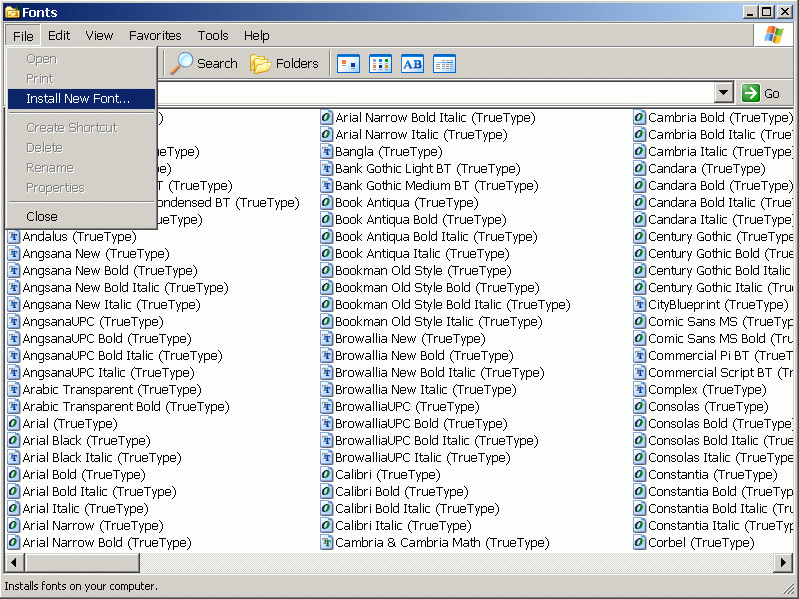
In the Fonts folder, one can choose to install new fonts through the File menu.
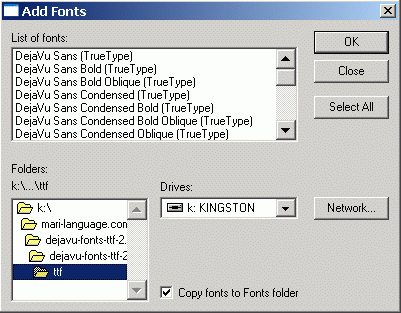
In the window that appears, navigate to the location in which you unzipped the fonts. Note that your fonts might be in a subfolder of this folder if you cannot find them at once.
Once the fonts in this folder are all detected, press the "Select All" button.
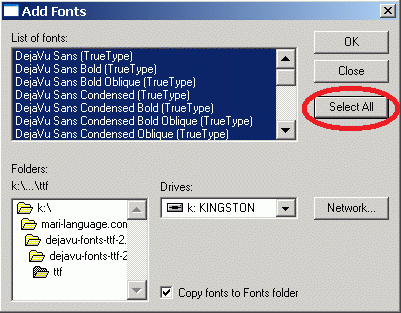
Click "OK", and you should be done.
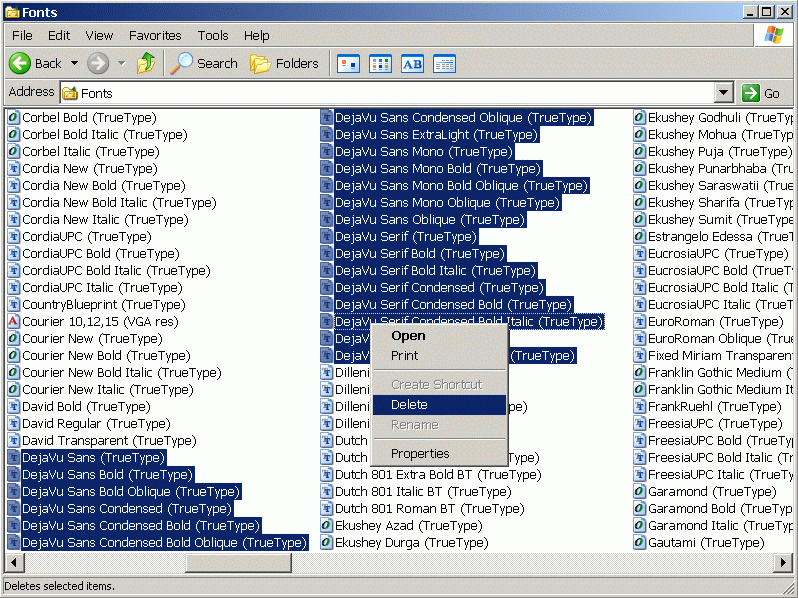
If you wish to remove fonts you have installed, simply activate them in the Fonts folder, right-lick, and choose the "Delete" option.
 |
 |
 |
 |
||
| The Mari Web Project is primarily based at the Department of Finno-Ugric Studies at the University of Vienna. The Mari-English Dictionary was funded by the Austrian Science Fund (FWF): P22786-G20. The second stage of the project is being funded by the Kone Foundation: The Mari Web Project: Phase 2. Some of our work is carried out at the Institute of Finno-Ugric and Uralic Studies at the Ludwig Maximilian University of Munich. | ||
| Last update:10 July 2014 | ||